Light Guide

The Light Teacher’s Guide is designed to coordinate with the ScienceWiz™ Light Teacher’s Pack which includes a book and materials for each student in the class, as well as the Light Workbook, which is sold separately.
Student Online Courseware Materials are also available.
Student interactive materials and assessments are provided in two forms:
1) One set of materials are set up for group sharing and discussions at the front of the class. You can present these materials using this guide. This Teacher’s Guide includes a highlighting capability which converts the selected text into speech. Highlight text to speak. Double click outside the text anywhere on the window background to stop the speech-to-text feature.
2) The second set of materials is available inside each student’s courseware account for them to explore and complete individually. The instructor will need to enter or bulk load the students’ names and email (or parents’) accounts to make use of this online courseware component. The online student courseware offers auto-grading and auto-record keeping.
Each student account also includes:
- a highlighting capability which converts the selected text into speech.
- an individual note-taking capability.
Your feedback is greatly appreciated. Please let us know what you like and what you would like to see changed or improved (pan@sciencewiz.com).
Module 1: Light & Color

The first three modules explores basic scientific properties of light.
These include 12 separate 30 – 40 minute lessons.
To prepare for this course, read and study pages 5-35 in the ScienceWiz™ Light Book. It is Light reading.
Module 1 – Lesson 1: Light sources, White Light & Rainbows (pgs 5-7)
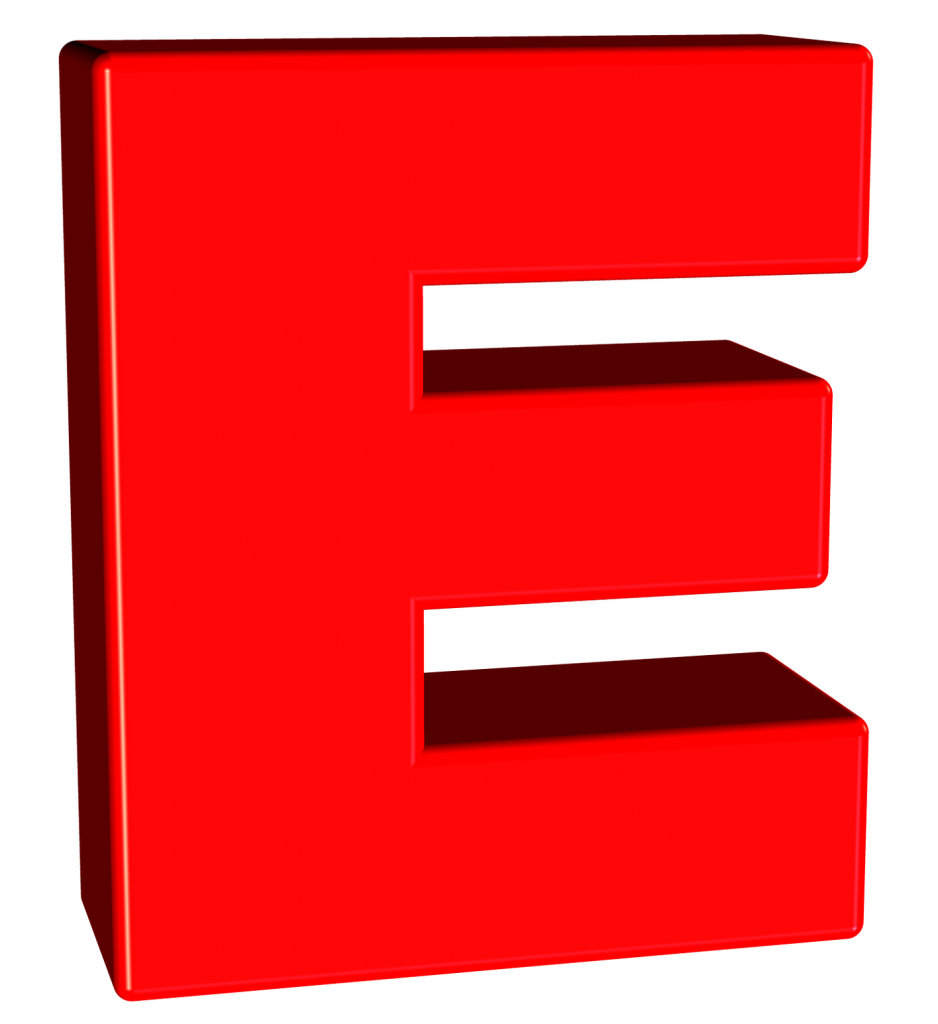
Before you begin, introduce Electra.
Click on the E or Electra, for a brief introduction.
Lesson 1: Learn to distinguish a light source from reflected light.
Collect and bring to class: flash light, candle, matches and plan to observe sun light and star light. Be familiar with the Glossary on page 38 – 39.
Hand out the Light Books to each student.
Have the students: observe the light sources that you brought and ask them to explain what these items have in common.
They are ALL sources of light.
Read page 5 aloud.

Which of these are light sources?
- The moon? NO. It absorbs and reflects the light from the sun.
- A Book? NO
- A TV screen? YES
- A cup? NO
- A computer monitor? YES
- Poster paint? NO
- House paint? NO
- An LED chain of lights? YES
- A cell phone screen? YES
- Food coloring? NO
- A printed page? NO
Read page 6 with the class.

Have students close their eyes. Do they see anything? Not much.
Eyes are VERY sensitive, so they see some light even with their eyes closed.
Do the projects on page 7.
Pass out the supplies and do the “Split Light” activities.

List the new words on a science vocabulary chart: light, light sources, rainbow, white light, rainbow order of light spectrum, prism. Use the Glossary at the back of book (pages 38 -39) as well as the pop-up definitions here, to help with defining words on your chart.
Show videos:
- How are rainbows formed?;
- The Primary Colors of LIGHT (RGB)
Class Assignment: In class, about 1-2 days after completing Lesson 1, have your students complete pages 4-6 in the Light Workbook.


Project page 7 in the Light Workbook on the front screen.
Read and discuss page 7 in class.

Module 1 – Lesson 2: Primary Colors of Light & Mixing Light (pgs 8-9)
Review: Light Sources versus Reflected Light: Have students make two lists: one of light source and another of objects that only reflect light. Have them hi-light the reflecting objects that they may have thought of as light sources, such as the Moon. Ask them to recall or define:
- The order of colors in a rainbow
- White light?
- Review any other words you have added to the chart.
Lesson 2: Learn about the primary colors of light: red, green, and blue.
Collect and Bring to Class: D-cell batteries.
Have students use a volt meter or use battery substitution in a simple circuit with a motor to pre-test the batteries.
Hand out: pink battery bands, alligator leads, motor, circle cards
Have the students: use markers or crayons to color the circle cards.
Have them spin the colored discs on the shaft of the motor to fool the eye into combining colors as shown on pages 8-9.
HINT: If holes in the paper become too large for the shaft of the motor, use a small strip of clear tape to tighten up the hole.


Read aloud page 9 and pass out the light sticks. Have the students use the light sticks to combine the primary colors of light on pages 9 – 10.

Use the Color Vision Simulation to answer the questions about mixing colors of light.

What color do you see when you combine:
- Green + red light?
- Blue + green light?
- Blue and red?
- Red + Green + Blue light?
Add the key words to the science vocabulary chart: primary colors of light — RGB.
- What does “R”, “G” and “B” each stand for?
- What colors are in white light?
Show videos:
- Repeat video: How are rainbows formed?
- The Primary Colors of LIGHT (RGB)
- Spin together colors to get white
Class Assignment: In class, in at least one day after doing Lesson 2, have your students complete pages 15 in the Light Workbook. Have each student explore the color simulation independently and answer the related questions based on their explorations.

Module 1 – Lesson 3: Light travels in a straight line (pgs 10-12)
Review: Have students tell you what they did during the last two classes and what vocabulary words they have learned. Discuss light sources and the primary colors of light (RGB).
Lesson 3: Learn how light travels, curving light and bouncing light.
Collect and bring to class: flashlights, baby powder, wet cloth for cleaning up, a ball, wooden blocks, a laser pointer, scissors, tape and glue. Look at pages 10-12 to prepare for the activities.
Have the students: discuss what they already know about the path of light?
IS it straight or curved or zigzag?
Follow the directions on the bottom of page 10 to observe a beam of light.
Show the videos:
Reflection and Refraction: “Light Travels in a Straight Line; Demo”
Notice that when the beam of light is pointed toward the top of the water tank, the light is reflected back into tank. This is called total internal reflection.
Do the same with a laser pointer in a darkened room.
Do NOT point the laser at anyone’s eyes.
Bounce lights off of a mirror (mylar) mounted on the wall or on a block.
Read and discuss the first half of page 11.

Do the experiment on page 11-12 to bounce light. Be sure that students
understand that the angle of light going in EQUALS the angle of light
going out as illustrated on page 11.

Have students work together to make a pattern with bounced laser light beams using mylar mounted on blocks. See footnote on page 12 for instructions.
Add the key words to the science vocabulary chart: reflection, bouncing light, “angle in equals angle out”
Show videos: “Reflection and Refraction; Reflection” You will find many video options to choose. Pre-select those that match to the topic of this class.
Class Assignment: In class, in at least 1-2 days after doing Lesson 3, have your students complete pages XX in the Light Workbook.
Module 1 – Lesson 4: Reflections (pgs 13-16)
Review: Have students in the class list the key ideas they have learned so far. Discuss the vocabulary words. Recall the rainbow order of colors, what a prism does, the primary colors of LIGHT, which combinations of primary colors of light make which secondary light colors. Light travels in a straight line. Light can be “bounced” or reflected and that angle in equals angle out.
Lesson 5: Learn about bouncing light from reflective surfaces. Explore mirror images and making a kaleidoscope.
Collect and bring to class: mirrors, small clear plastic cups, marbles,
masking tape, scotch tape, scissors. Look at pages 13 – 16 to prepare stations for supplies for activities.
Have students work with partners and do the activities on pages 13-16.
Read aloud and discuss as a class as your go along.


Add the key words to the chart: virtual image, kaleidoscope, transparent and translucent
Show the videos on reflection and refraction:
- What is a Kaleidoscope?
- How a Kaleidoscope Works; Construction Variations”
- Human Kaleidoscope; TED Video
- A Splendor of Patterns; Kaleidoscope Patterns
Class Assignment: In class, at least one day after doing Lesson 4, have your students complete pages 13 in the Light Workbook.

Module 1 – Lesson 5: Absorbing and Combining Pigments (pgs 17-18)
Review: Have students recall and discuss the following:
- The order of colors in the rainbow
- What does a prism do?
- What are the primary colors of LIGHT?
- What combinations of the primary colors of light make the secondary colors of light.
- Light travels in a straight line.
- Remember with bouncing or reflecting light, “the angle in equals the angle out.”
- How does a kaleidoscope work?
Lesson 5: Learn how objects reflect, absorb and scatter light. Discover that the primary colors of pigments are not the same as the primary colors of light.
The primary colors of pigments are cyan, magenta and yellow (CMY)!
Notice on the color wheel on page 9, that the secondary colors of light are the primary colors for pigments.
Collect and bring to class: lots of food coloring, cups to mix food coloring and water.
Have the students: discuss how many objects that are NOT light sources are still visible because they reflect at least SOME light as discussed on pages 17-18. Do the experiment with how PIGMENTS combine colors.


Add the key words to the science vocabulary chart: pigments, absorption of light, subtractions of light, primary colors of pigments are the secondary colors colors of light.
Show the videos:
- Mixing Paints; Coloring with Paints
- Combining Colors Light vrs Pigments; Movie and Quiz”
(This video starts with the electromagnetic spectrum but
proceeds to the primary colors of light and pigments.)
Class Assignment: In class, at least one days after doing Lesson 5, have your students complete pages 16-17 in the Light Workbook.


Module 2: Transmitting and Bending Light

Module 2 – Lesson 1: Bend Light & Make Lenses (pgs 19-22)
Review: Have students describe what they have learned so far and discuss the science vocabulary words. Be sure to recall the order of colors in the rainbow, the function of a prism, the primary colors of LIGHT, which combinations of primary colors of light make which secondary light colors. Light travels in a straight line. Review bouncing or reflecting light and angle in equals angle out. Discuss how a kaleidoscope work. What are the primary colors of pigments and what are the secondary colors? How does this relate the the primary colors of light?
Lesson 1: Learn about refraction and concave and convex lenses.
Collect and bring to class: plastic cups, pencils, water, oil. If you plan to make only water lenses, as described in the footnote on page 22, you will need no other supplies.
If you make the gelatin lenses as well, then you will need a microwave, access to a refrigerator, a tray, pot holders, measuring cups and spoons.
Practice making a lens prior to the class.
Show: This introductory video prior to doing the experiments: “Refracted Light Introduction.”
Do the experiments on pages 19. Add in the use of oil to water for to extend the concept of refraction through multiple materials, as shown on the first video below.

Show the videos:
1) “Refraction: Air vrs Oil vrs Water; Demonstration”
2) “Magic Marbles become invisible; Refracting jelly marbles”
3) “Details of reflection and refraction; Demonstration Video”

This maybe a full lesson, depending on the experiments you chose and
the length of the class discussion.
If you chose to make the convex and concave lenses, follow the instructions on page 21-22. Have students work with a partner or set this activity up in centers.


Add the key words to the science vocabulary chart: reflection (review), refraction, magnification, transparent, lenses, shape, convex, concave
Show the following videos:
1) “Images and Lenses”
2) “Concave and Convex Lenses”
Class Assignment: Have your students complete the course ware interactive and quiz.
Module 2 – Lesson 2: Lenses, Focal Point & Combining Lenses (pgs 23-25)
Learn about focal points.
Review: Have students describe what they have learned. Discuss the science vocabulary words. Review: bouncing or reflecting light and angle in equals angle out. Discuss how convex and concave lenses work. If you made gelatin lenses, give students time to observe with their lenses and read page 22.
Lesson 2: Lenses and focal point, combining lenses.
Learn that each lens has a distance at which objects are clearest.
Collect and bring to class: objects to observe with lenses, class set of rulers, microscopes if available, spoons for each student, convex and concave mirrors, a parabolic reflector (a toy available as a “microscope”)
Have the students: Do the experiments on pages 23 -25 as you read aloud. Discuss key concepts.


Show the videos:
1) “Images and Lenses”
2) “Concave and Convex Lenses”
Pre-select those videos that best match this class.
Add these key words to the science vocabulary chart: focal point, microscope and telescope
MIRRORS, like lenses, can have convex and concave shapes. These shapes are used in telescopes, flashlights, automobile headlights, solar ovens and “fun house” mirrors.
Have the students: View explore their reflections on both the concave and convex sides of the spoons. Have them observe how their image changes as they move the spoons closer and farther away. Can they find a distance where their image blurs? How close does the spoon have to be for their image to flip to right side up?
Also, have students explore virtual images with the parabolic reflector.
Show:
1) “Concave mirror demonstration; Moving through the focal point”
2) “Real and Virtual objects; Concave mirror demonstration”
3) “Concave and convex mirrors; Video Lecture”
Add these key words to the science vocabulary chart: virtual image, parabolic reflector
Class Assignment: In class, at least one day after doing Lesson 2, have your students complete pages 30-31 in the Light Workbook.


Module 2 – Lesson 3: Transparent, Opaque, Translucent (pgs 26-27)
Review: Have students in the class tell you what they have learned so far and what were the new vocabulary words they learned. Have students explain magnifying lenses and how they make a simple microscope and telescope.
Lesson 3: Learn which materials can been seen through and which block light.
Collect and bring to class: flashlights, transparent and translucent objects. Opaque objects can be found throughout the classroom.
Do the experiments on pages 26 -27 with real objects. Read these pages aloud and discuss the key concepts.


Add these key words to the science vocabulary chart: translucent, transparent, opaque
Show: A review Quiz Video to do in class or assign for homework: Games and Activities “Question on Light; Quiz Game”
Class Assignment: At least one day after doing Lesson 3, have your students complete pages 18-20 in the Light Workbook.


Module 2 – Lesson 4: Light & Shadows (pgs 28)
Review: Have students in the class tell you what they have learned so far. Review the vocabulary words including: transparent, translucent and opaque.
Lesson 4: Capture Shadows. Learn how shadows are created.
Collect and bring to class: flashlights and opaque object such as cut paper shapes, leaves and coins.
Have the students: Make hand shadows on a wall in a darkened classroom and then capture a shadow doing as shown on page 28.

People make shadows. Objects make shadows.
You can even make a clock using shadows.

The Moon and Planetary Bodies cast shadows, too.
Turn to pages 28 and 29 in the Light Workbook, to learn more about shadows and lunar and solar eclipses.


Assign the interactive on internet to explore shadow’s further.
Show: Go to www.ScienceWiz.com, The Portal of Discovery Light and show in class:
1) “Making shadows; Internet Activity”
2) “BBC Shadows; Play, read, quiz”
(For classroom — go to READ button first)
Add the key words to the chart: shadow, light sensitive paper
Class Assignment: In class, in at least one day after doing lesson one, have your students complete pages — in the Light Workbook.
Module 3: More to Light than Meets the Eye
This module includes an elementary introduction to the electromagnetic spectrum. Lesson 2 must not be skipped. It includes one of the greatest discoveries in all of science and is a cornerstone to all of modern science and technology.

Module 3 – Lesson 1: Diffraction, Feathers & Filters (pgs 30-31)
Review the new terms: convex and concave lenses and mirrors, transparent, translucent and opaque and how you caste a shadow.
Lesson 1: Learn how feathers and CDs can split white light into a rainbow. Explore filters.
Collect and bring to class: old CD’s and flashlight
Hand out: magnifiers, old CD’s and feathers.
Read aloud and explore diffraction gratings on pages 30-31.


Hand out and use filters and make a filter box.

Show: Go to www.ScienceWiz.com, Light Portal, Diffraction and Filters
1) “Diffraction; Video Lecture”
Add the key words to the chart: diffraction, diffraction grating, filters
Class Assignment: In class, in at least one day after doing Lesson 2, have your students complete pages XX in the Light Workbook.
Module 3 – Lesson 2: Invisible Light (pgs 32-33)
Lesson 3: Learn about invisible “Light” and the electromagnetic spectrum.
Collect and bring to class: Cardboard boxes (enough for each pair of students to have their own box), masking tape
Hand out: (Students will work in pairs.) Hand out 1 cardboard box, 1 prism and 3 thermometers per two students. Also, hand out the Light Workbooks.
Let’s take the temperature of colors in the rainbow! Follow the instructions on pages 8-10 to find out if the different colors of the rainbow have different temperatures. What do students predict? Is blue cooler than red? BE SURE to cover the idea of a control in designing an experiment.


What did the students observe?
Project and have student turn to page 10 in the Light Workbook and discuss.

Hand out the Light Books.
Read aloud and discuss electromagnet spectrum and key concepts about electromagnet waves on pages 32-33.


Show: Go to www.ScienceWiz.com, The Portal of Discovery Light and show in class:
1) “Walk the Plank; Quiz Game”
2) “Electromagnetic Spectrum; Quiz Game”
3) “Photons and Waves; Movie and Quiz”
Read aloud and discuss Illuminating facts pages 34-35.


Add the key words to the science vocabulary chart: electromagnetic spectrum, wave length, radio waves, microwaves, infrared, x-rays
Class Assignment: In class, 1 day after doing Lesson 2, have your students complete pages 12 in the Light Workbook.

Module 4: Light & Cross-cutting Elements and Engineering
This module applies and extends the topics in the Light Book to key cross-cutting elements including:
- the use of the idea of reflection to understand the phases of the Moon,
- the study of how the brain processes visual information in surprising ways using optical illusions and manipulations with colors
- the application of engineering principles to make a simple camera and design a periscope

Module 4 – Lesson 1: Light Sources, Reflections and the Phases of the Moon


Module 4 – Lesson 2: Cameras (pgs 29)
Lesson 2: Making a Camera Obscura (Pin Hole Camera)
Learn how the original cameras worked. Explore the basics of digital cameras.
Collect and bring to class: Fresh wax paper, pencil with a sharp point, scissors
Have the students: Construct a camera obscura as shown on page 29.

Relate the camera obscura to the first pinhole cameras which had light sensitive paper in stead of wax paper. This light sensitive paper captured the image projected on the back of the box opposite to the hole and the lens.
Show video in class:
Go to ScienceWiz.com, Light Portal, Microscopes and Telescopes and Cameras
“Turning a Room into a Cameral Obscura; Instructional Video”
Add the key words to the chart: camera obscura, pinhole camera, film
Class Assignment: In class, in at least one day after doing Lesson 2, have your students complete pages XX in the Light Workbook.
Module 4 – Lesson 3: Optical Illusions (pgs 29 Workbook)
Lesson 3: Optical illusions are fascinating. This lesson is an all-time favorite among students and adults. Page 24 of the workbook introduces students to a simple optical illusion.

Click here to watch the optical illusions videos online.
Optical illusions give us insight into how the brain is processing
visual information. They are fascinating.
Class Assignment: Have students do the color test at the bottom on the page. What is very interesting is that there tends to be a difference in how male and female brains, especially in adults, process this information. Do the students detect a difference among themselves or in their parents or siblings? Have students use this chart to design an experiment and record their results. What controls can they devise to avoid artifacts and keep the tests consistent, so they can make good comparisons?

Module 4 – Lesson 3: Designing Periscopes (pgs 26 Workbook) – An Engineering project
Page 26 in the Workbook gives a starter example of how to build a periscope.

Improvements can be made by students by adding a second piece that fits just outside the first one. In this case, each piece should
have only one mirror at the far ends. Have students design their
own periscopes so they can look over a tall fence or around a corner.
Module 5: Vocabulary, Review, Assessment and Achievement Awards

Module 5 – Lesson 1: Vocabulary
Review the science vocabulary in the chart.
Have them complete this word find or design their own.

Have them exercise the spelling of these words using the online crossword puzzle. They will solve the puzzle when ALL the words are SPELLED CORRECTLY!! Puzzle it out.

Module 5 – Lesson 2: Review
Go over this quiz either at the front of the class or online using this link.

Suggested quizzes and materials: On ScienceWiz.com, Portal of Discovery Light:
1) “Questions on Light; Quiz Game”
2) “On colors, reflection, refraction and more; Quiz”
Use the link below to find out what children in England learn about Light. Read it together out loud.

Class Assignment: Try answering the questions that students in England asked about the topic of Light. Could you answer them all?
Module 5 – Lesson 3: Assessment
Module 5 – Lesson 4: Achievement Awards
Have your students decode the secret password in the Light Workbook. Have them use it to download and print their achievement badges.

NOTE: Light is part of a progression that covers a major topic area in the Physical Sciences: Physics and Waves. A basic understanding of this topic is essential to functioning in modern society as it extends into and impacts practically all aspects of our lives.

Have student research the answers that they did not know using web searches.